How to Set/ Reset cPanel Password of Hostgator’s Hosting in 2022?
If you are using Hostgator’s Hosting service or you have purchased a new Hosting service plan from the Hostgator website then you have to update or set (for new user) password for the cPanel account. Recently from June 2022, Hostgator has started flashing a notification to all hosting user accounts and they said, “To ensure best security practice, we encourage you to reset all your cPanel passwords from the control panel before 1 June 2022”.
Earlier, if you used to purchase a hosting plan from Hostgator Website, then you used to get the username and password of the cPanel account in the email after the confirmation of the purchased invoice. But now if you purchase any hosting plan from Hostgator, then you will get the only username and cPanel URL and you will have to generate its password yourself (it is just for the security purpose). If you are a new user, then you have to set the new password for your cPanel Account but how you can do that?
If you want to know how to set a new cPanel password or reset the password for Hostgator Hosting service then you are in the right place. Here you will get to know how you can do this easily.
Table of Contents
How to Set/ Reset Hostgator’s cPanel Password?
To Set a new password for cPanel or Reset the password of cPanel, you just need to follow the below step-by-step guide.
Step 1
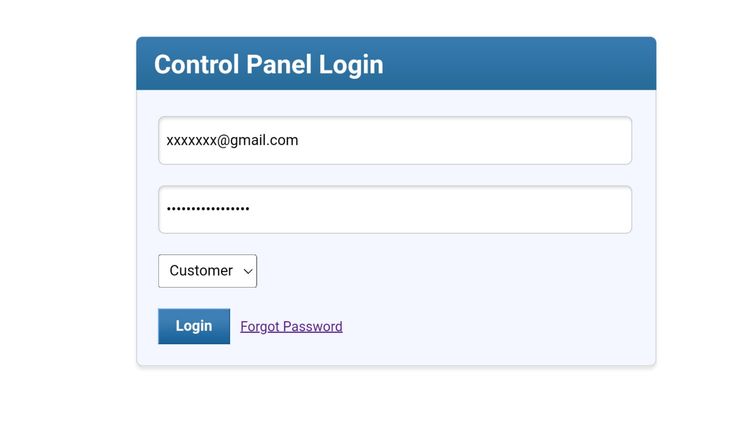
First of all, you have to login into your Hostgator account or go to the https://manage.hostgator.in (for India) website and make sure you have selected the Customer Login option. Here Enter your Email id and password which is registered with Hostgator.
Step 2
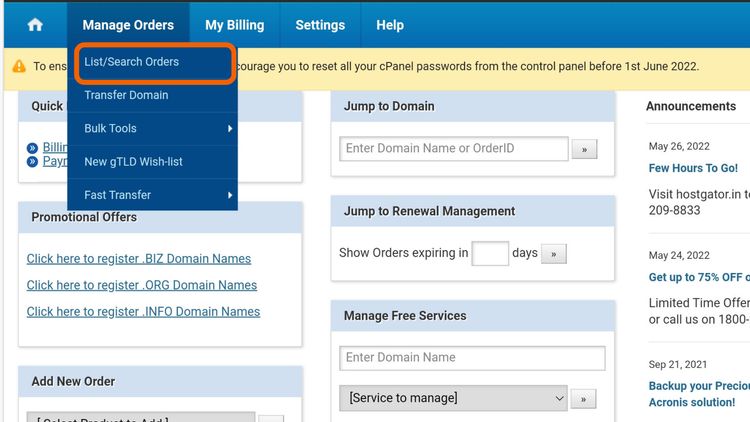
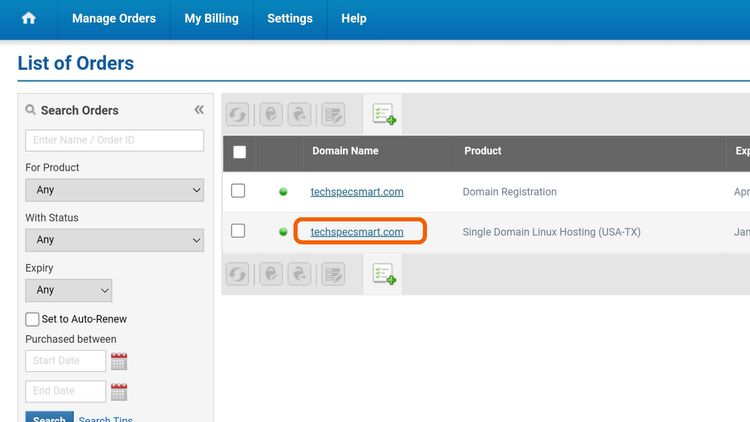
After successful login into your Hostgator account, here you will get to see the “Manage Orders” option. Simply go to the Manage Orders option and then select the “List/Search Orders” option. After that, you will get to see your product details. Just click on the domain link of the hosting product row. (See image)
Step 3
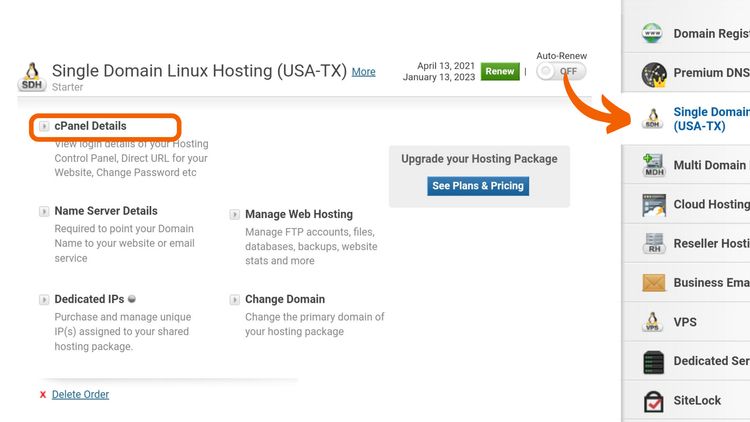
If you have purchased the “Single Domain Linux Hosting” plan then you will see the “Single Domain Linux Hosting (USA-TX)” option, in this section, there will be a “cPanel Details” option just click on it and then you will get to see a pop-up where you can change your password.
Step 4
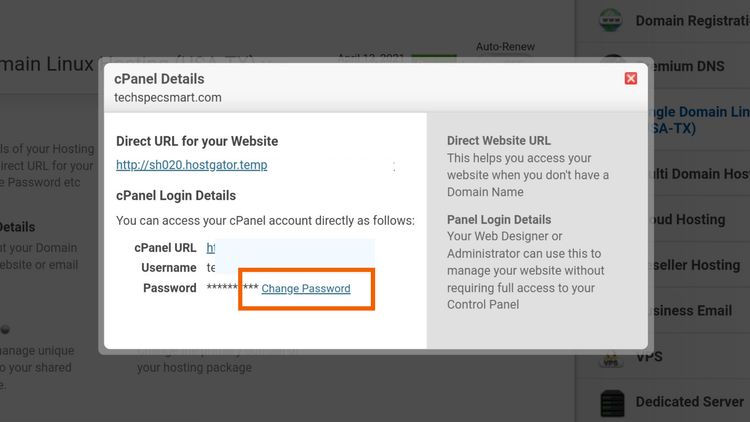
In the pop-up box just click on the “Change Password” option and then enter a strong new password for your cPanel here (Must read the Password requirements section to create a strong password). After updating the new password successfully now you can login into cPanel Account with the newly generated password.
You May Also Like


